 PHP代码加密 第3章 php-beast
一、简介
php-beast 基于扩展,免费,网址:https://github.com/liexusong/php-beast
开源项目,基于扩展来加解密,可选 DES、AES、BASE64 加密算法。支持自定义开发加密模块。
二、安装
下载 php-beast
cd /usr/local

git clone https://github.com/liexusong/php-beast.git
安装 php 扩展
cd /usr/local/php-beast

/usr/local/php/bin/phpize
备注:请输入服务器的 phpize 文件路径
./configure --with-php-config=/usr/local/php/bin/php-config
备注:请输入服务器的 php-config 文件路径
make

make install
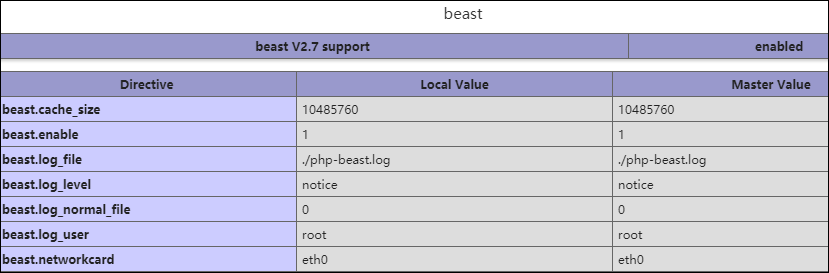
成功之后,我们打开 php.ini,把 beast.so 加入到文件最后,重启 php 进入 phpinfo,查看是否扩展已成功安装
注意:测试 PHP 7.3 加密后无法正常运行。
三、加密
3.1、方法一
安装完 php-beast 后可以使用 tools 目录下的 encode_files.php 和 encode_file.php 来加密你的项目。
encode_file.php 使用方法
php encode_file.php --encrypt DES --oldfile 1.php --newfile 22.php
encode_files.php 使用方法
使用 encode_files.php 之前先修改 tools 目录下的 configure.ini 文件,如下:
; source path
src_path = ""

; destination path
dst_path = ""

; expire time
expire = ""

; encrypt type
encrypt_type = "DES"
src_path 是要加密项目的路径,dst_path 是保存加密后项目的路径,expire 是设置项目可使用的时间 (expire 的格式是:YYYY-mm-dd HH:ii:ss)。
encrypt_type 是加密的方式,选择项有:DES、AES、BASE64。 修改完 configure.ini 文件后就可以使用命令 php encode_files.php 开始加密项目。
3.2、方法二
使用 beast_encode_file() 函数加密文件,函数原型如下
beast_encode_file(string $input_file, string $output_file, int expire_timestamp, int encrypt_type)。
$input_file:要加密的文件
$output_file:输出的加密文件路径
$expire_timestamp:文件过期时间戳
$encrypt_type:加密使用的算法(支持:BEAST_ENCRYPT_TYPE_DES、BEAST_ENCRYPT_TYPE_AES)
3.3、函数列表
beast_encode_file(): 用于加密一个文件
beast_avail_cache(): 获取可以缓存大小
beast_support_filesize(): 获取beast支持的最大可加密文件大小
beast_file_expire(): 获取一个文件的过期时间
beast_clean_cache(): 清空beast的所有缓存(如果有文件更新, 可以使用此函数清空缓存)
3.4、Debug
可以在 configure 时加入 --enable-beast-debug 选项来开启 debug 模式。
开启 debug 模式后需要在 php.ini 配置文件中加入配置项:beast.debug_path 和 beast.debug_mode。
beast.debug_mode 用于指定是否使用 debug 模式,而 beast.debug_path 用于输出解密后的php脚本源码。这样就可以在 beast.debug_path 目录中看到 php-beast 解密后的源代码,可以方便知道扩展解密是否正确。
四、配置
4.1、加密文件头
使用 header.c 文件可以修改 php-beast 加密后的文件头结构,这样网上的解密软件就不能认识我们的加密文件,就不能进行解密,增加加密的安全性。
4.2、机器网卡
php-beast 提供只能在指定的机器上运行的功能。要使用此功能可以在 networkcards.c 文件添加能够运行机器的网卡号,例如:
char *allow_networkcards[] = {
    "fa:16:3e:08:88:01",
    NULL,
};
这样设置之后,php-beast 扩展就只能在 fa:16:3e:08:88:01 这台机器上运行。
另外要注意的是,由于有些机器网卡名可能不一样,所以如果你的网卡名不是 eth0 的话,可以在 php.ini 中添加配置项: beast.networkcard = "xxx" 其中 xxx 就是你的网卡名,也可以配置多张网卡,如:beast.networkcard = "eth0,eth1,eth2"。
4.3、修改默认加密的key
使用 php-beast 时最好不要使用默认的加密 key,因为扩展是开源的,如果使用默认加密key的话,很容易被人发现。所以最好编译的时候修改加密的 key,aes模块可以在 aes_algo_handler.c 文件修改,而 des 模块可以在 des_algo_handler.c 文件修改。
修改加密后的文件头结构:打开 header.c 文件,找到以下代码
char encrypt_file_header_sign[] = {
    0xe8, 0x16, 0xa4, 0x0c,
    0xf2, 0xb2, 0x60, 0xee
};
int encrypt_file_header_length = sizeof(encrypt_file_header_sign);
自定义修改以下代码(其中的数字的范围为:0-8,字母的范围为:a-f):
0xe8, 0x16, 0xa4, 0x0c,
0xf2, 0xb2, 0x60, 0xee
修改 aes 模块加密 key:打开 php-beast-master/aes_algo_handler.c文件,找到以下代码:
static uint8_t key[] = {
0x2b, 0x7e, 0x61, 0x16, 0x28, 0xae, 0xd2, 0xa6,
0xab, 0xi7, 0x10, 0x88, 0x09, 0xcf, 0xef, 0xxc,
};
自定义修改以下代码(其中的数字的范围为:0-8,字母的范围为:a-f):
0x2b, 0x7e, 0x61, 0x16, 0x28, 0xae, 0xd2, 0xa6,
0xab, 0xi7, 0x10, 0x88, 0x09, 0xcf, 0xef, 0xxc,
修改 des 模块加密 key:打开 php-beast-master/des_algo_handler.c 文件,找到以下代码:
static char key[8] = {
0x21, 0x1f, 0xe1, 0x1f,
0xy1, 0x9e, 0x01, 0x0e,
};
自定义修改以下代码(其中的数字的范围为:0-8,字母的范围为:a-f):
0x21, 0x1f, 0xe1, 0x1f,
0xy1, 0x9e, 0x01, 0x0e,
修改 base64 模块加密 key:打开 php-beast-master/base64_algo_handler.c 文件,自定义修改以下代码:
static const short base64_reverse_table[256] = {
-1, -1, -1, -1, -1, -1, -1, -1, -1, -1, -1, -1, -1, -1, -1, -1,
-1, -1, -1, -1, -1, -1, -1, -1, -1, -1, -1, -1, -1, -1, -1, -1,
-1, -1, -1, -1, -1, -1, -1, -1, -1, -1, -1, 62, -1, -1, -1, 63,
52, 53, 54, 55, 56, 57, 58, 59, 60, 61, -1, -1, -1, -1, -1, -1,
-1, 0, 1, 2, 3, 4, 5, 6, 7, 8, 9, 10, 11, 12, 13, 14,
15, 16, 17, 18, 19, 20, 21, 22, 23, 24, 25, -1, -1, -1, -1, -1,
-1, 26, 27, 28, 29, 30, 31, 32, 33, 34, 35, 36, 37, 38, 39, 40,
41, 42, 43, 44, 45, 46, 47, 48, 49, 50, 51, -1, -1, -1, -1, -1,
-1, -1, -1, -1, -1, -1, -1, -1, -1, -1, -1, -1, -1, -1, -1, -1,
-1, -1, -1, -1, -1, -1, -1, -1, -1, -1, -1, -1, -1, -1, -1, -1,
-1, -1, -1, -1, -1, -1, -1, -1, -1, -1, -1, -1, -1, -1, -1, -1,
-1, -1, -1, -1, -1, -1, -1, -1, -1, -1, -1, -1, -1, -1, -1, -1,
-1, -1, -1, -1, -1, -1, -1, -1, -1, -1, -1, -1, -1, -1, -1, -1,
-1, -1, -1, -1, -1, -1, -1, -1, -1, -1, -1, -1, -1, -1, -1, -1,
-1, -1, -1, -1, -1, -1, -1, -1, -1, -1, -1, -1, -1, -1, -1, -1,
-1, -1, -1, -1, -1, -1, -1, -1, -1, -1, -1, -1, -1, -1, -1, -1
};
注意:修改这些配置需要重新生成 beast.so 扩展
4.4、自定义
首先创建一个 .c 的文件。例如我们要编写一个使用 base64 加密的模块,可以创建一个名叫 base64_algo_handler.c 的文件。然后在文件添加如下代码:
#include "beast_module.h"
int base64_encrypt_handler(char *inbuf, int len, char **outbuf, int *outlen)
{
    ...
}
int base64_decrypt_handler(char *inbuf, int len, char **outbuf, int *outlen)
{
    ...
}
void base64_free_handler(void *ptr)
{
    ...
}
struct beast_ops base64_handler_ops = {
    .name = "base64-algo",
    .encrypt = base64_encrypt_handler,
    .decrypt = base64_decrypt_handler,
    .free = base64_free_handler,
};
模块必须实现3个方法,分别是:encrypt、decrypt、free方法。
encrypt 方法负责把 inbuf 字符串加密,然后通过 outbuf 输出给 beast。
decrypt 方法负责把加密数据 inbuf 解密,然后通过 outbuf 输出给 beast。
free 方法负责释放 encrypt 和 decrypt 方法生成的数据。
写好我们的加密模块后,需要在 global_algo_modules.c 添加我们模块的信息。代码如下:
#include #include "beast_module.h"
extern struct beast_ops des_handler_ops;
extern struct beast_ops base64_handler_ops;
struct beast_ops *ops_handler_list[] = {
    &des_handler_ops,
    &base64_handler_ops, /* 这里是我们的模块信息 */
    NULL,
};
修改 config.m4 文件,修改倒数第二行,如下代码:
PHP_NEW_EXTENSION(beast, beast.c des_algo_handler.c beast_mm.c spinlock.c cache.c beast_log.c global_algo_modules.c * base64_algo_handler.c *, $ext_shared)
base64_algo_handler.c的代码是我们添加的,这里加入的是我们模块的文件名。
现在大功告成了,可以编译试下。如果要使用我们刚编写的加密算法来加密 php 文件,可以修改 php.ini 文件的配置项
beast.encrypt_handler = "base64-algo"
名字就是我们模块的 name


